Open or paste
Open a .zpl or text file, paste an existing format, or start from the included sample. Documents can contain multiple ^XA / ^XZ label blocks.
A practical workspace for Zebra ZPL
Open or paste raw ZPL, inspect the rendered label, make precise changes, merge business data, and send the finished source directly to a Zebra printer.
ZPL Studio is currently unsigned, so Windows SmartScreen may display a warning on first launch.
No separate .NET runtime installation is required. Keep the supplied folder contents together.
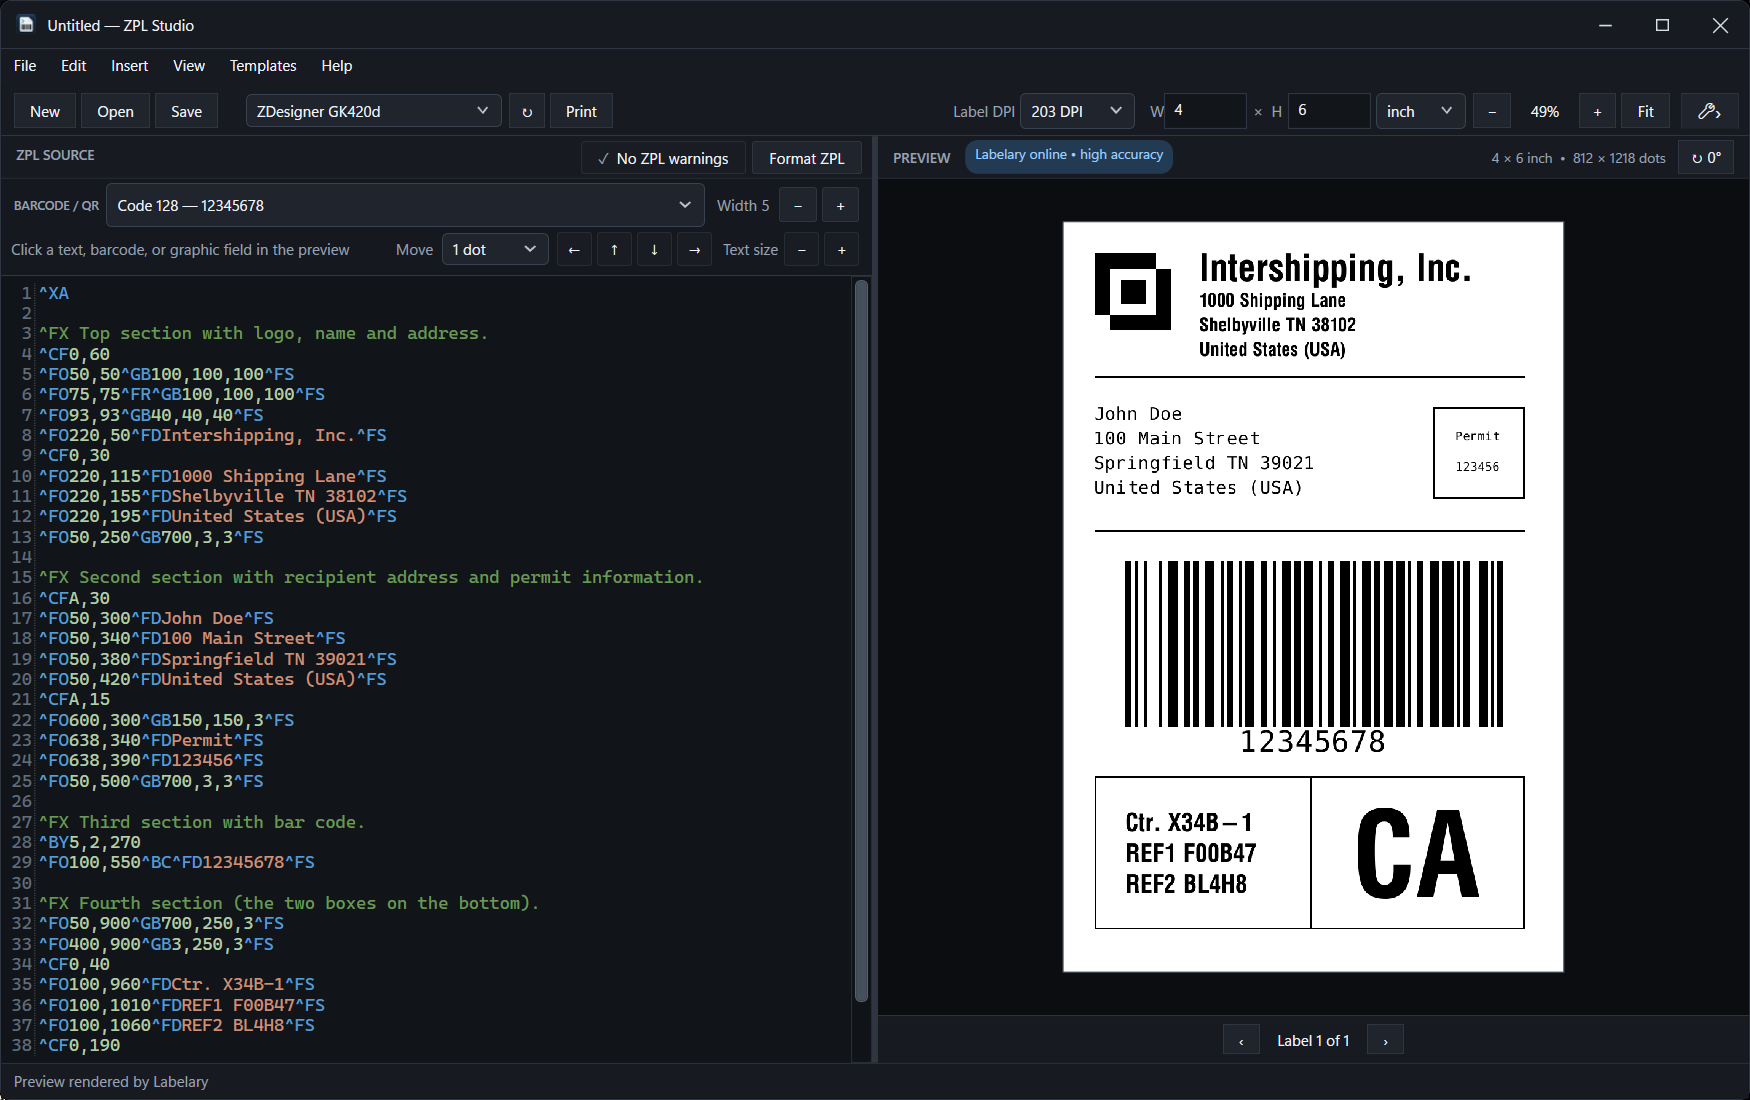 Actual application interface · Open full size ↗
Introduction / Quick start
ZPL Studio is built for people who already work with Zebra labels—or need to learn what an existing format is doing. The source editor remains authoritative: visual adjustments update the ZPL, and printing sends that source rather than a screenshot.
Open a .zpl or text file, paste an existing format, or start from the included sample. Documents can contain multiple ^XA / ^XZ label blocks.
Set the intended DPI and physical dimensions, then use Labelary for high-accuracy online rendering or switch to the built-in local preview.
Trace warnings, adjust supported objects, verify the selected Windows queue and media, then send the complete source as RAW ZPL.
The ZPL workspace
The left pane is a line-numbered ZPL editor with syntax highlighting, undo/redo, find and replace. Hover a recognized command such as ^FO or ^FD to see its purpose, parameters and interpreted values.
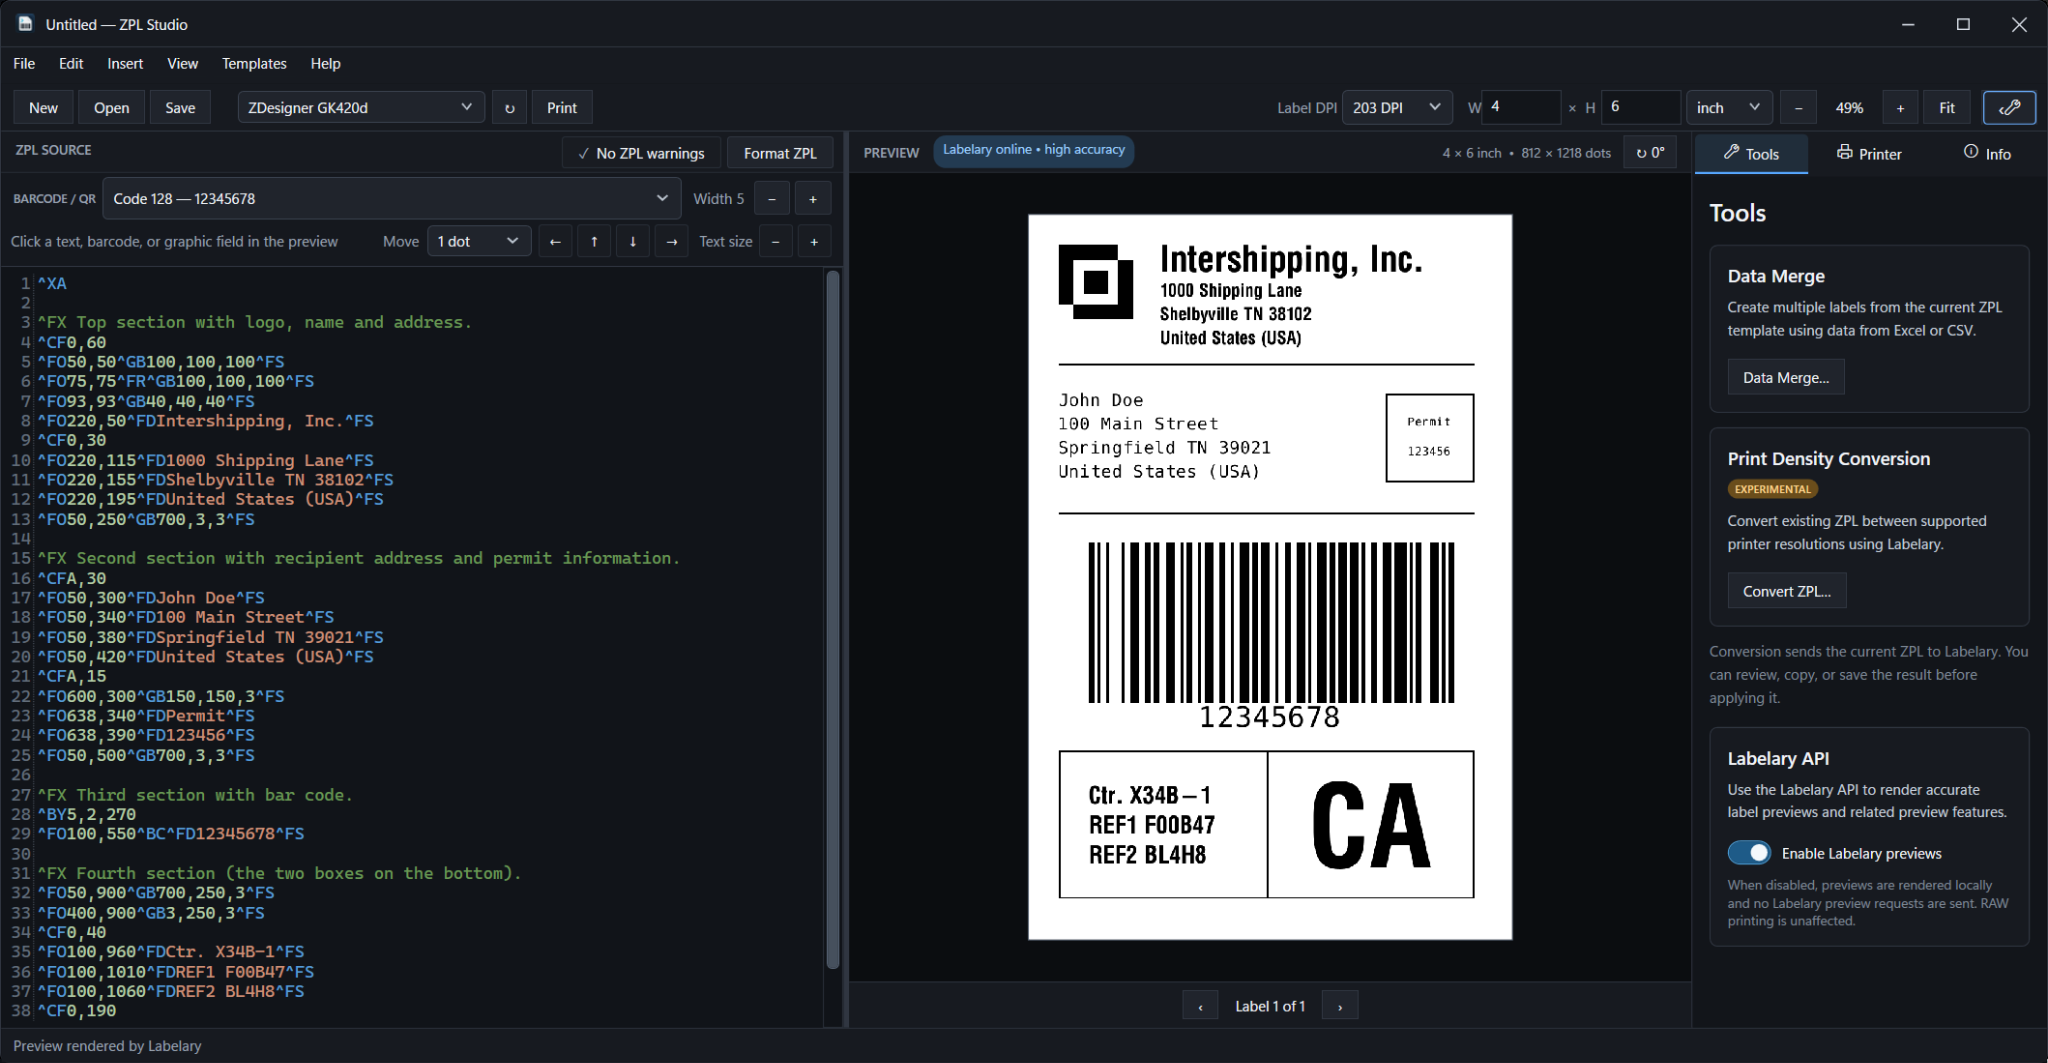 Tools sidebar with Data Merge, DPI conversion and preview mode · Open full size ↗
Visual editing
Supported label objects can be inspected and adjusted while the corresponding ZPL remains visible. ZPL Studio derives positions from the source—it does not use OCR and it does not hide the commands being changed.
Hover and click recognized text, barcodes, QR codes, boxes, lines and graphics. Click again to cycle through overlapping objects.
Move supported objects by 1, 5, 10 or 20 dots. ZPL Studio updates explicit ^FO or ^FT coordinates.
Adjust supported standard text, linear barcode module width, or QR magnification without changing unrelated fields.
Double-click supported text, barcode or QR objects to replace their field value directly over the preview.
Each applied move, resize or inline value change is an undoable source edit.
Interactive controls require a recognized object with an explicit numeric position. Unsupported or custom structures can remain visible while staying view-only.
Insert and build labels
Use the Insert menu to generate Code 128 barcode or QR code source at the current editor position. Enter the content, dot position, size and orientation, then continue working with the generated ZPL.
This is a precise source-building helper, not a freeform drag-and-drop designer. The editor remains the complete label definition.
^FO50,50^BY2^BCN,100,Y^FD123456789^FS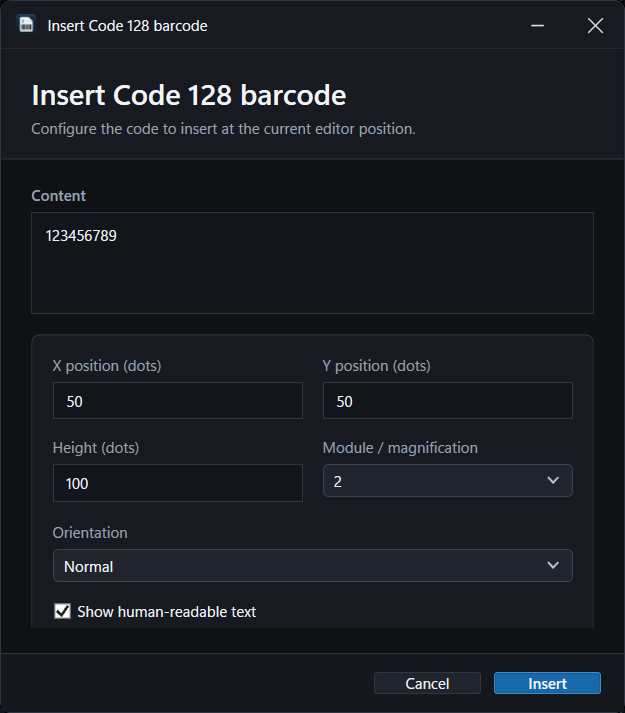 Code 128 insertion dialog · Open full size ↗
Data Merge
Place exact, case-sensitive tokens such as ##NAME##, ##ADDRESS## and ##BARCODE## in the source. Import an Excel .xlsx workbook or UTF-8 CSV, then map every placeholder to a column or a fixed value. The editor stays unchanged as the template.
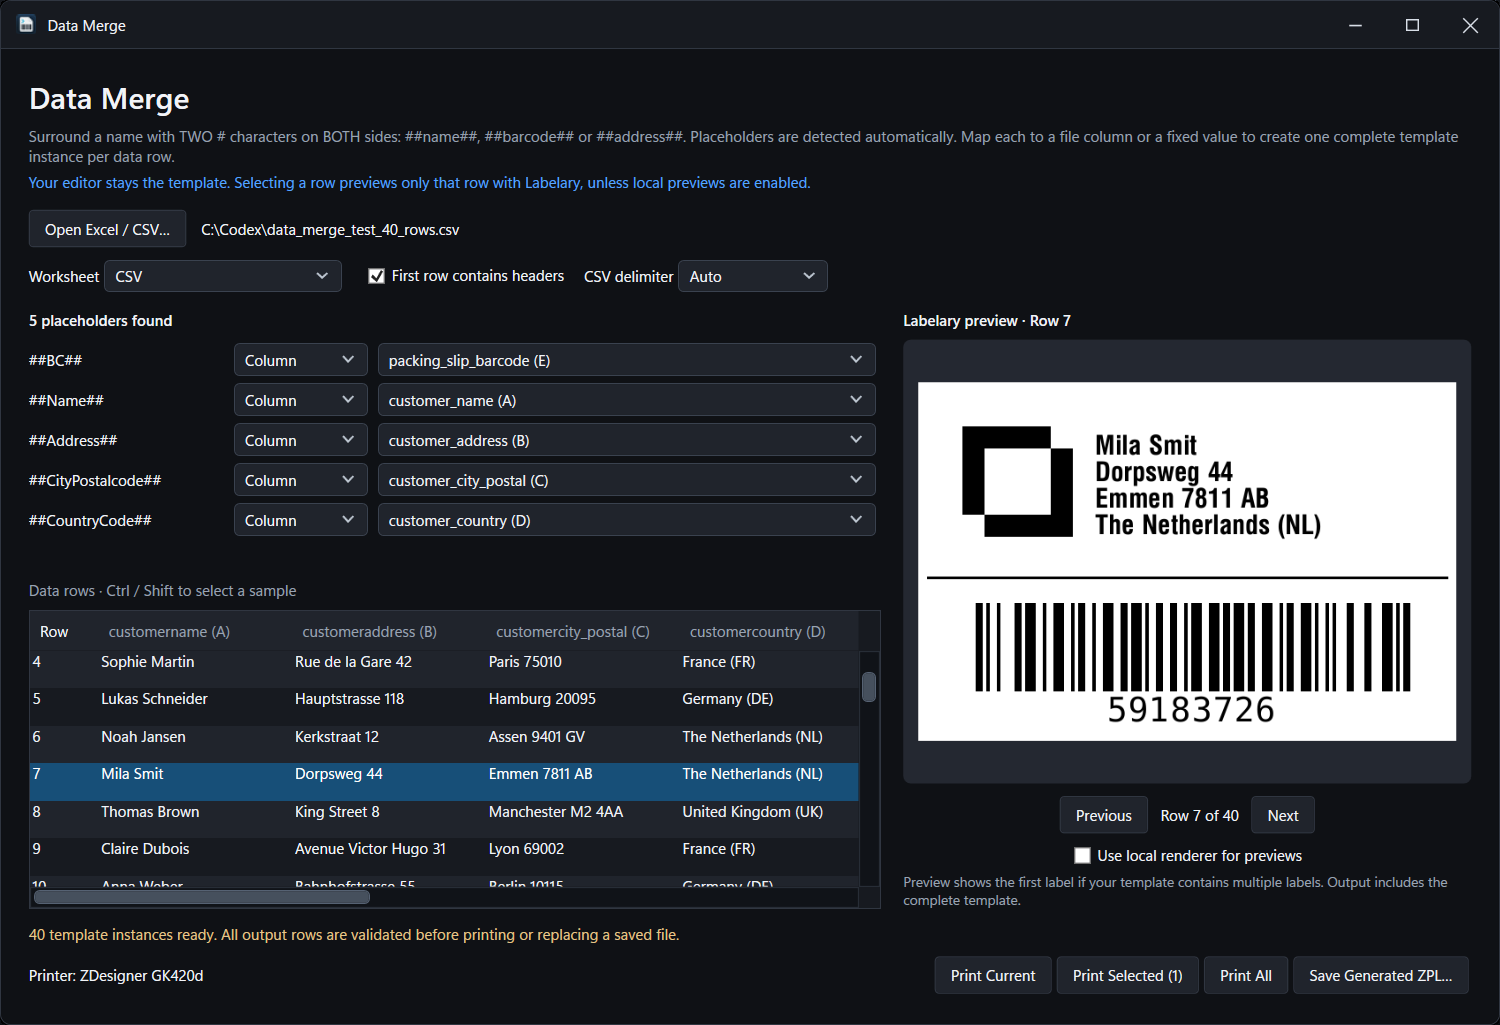 Mapped CSV data with a selected-row Labelary preview · Open full size ↗
Repeated placeholders share one mapping. Names may contain letters, numbers, underscores and hyphens—no spaces.
Select CSV/Excel columns or fixed values. Invalid files, missing mappings and unsafe field data block output.
Select a row and move through the data. Use Labelary by default or enable the local renderer for row previews.
Print Current, Print Selected or Print All, or save every generated template instance as one ZPL file.
RAW ZPL printing
Select an installed Windows printer in the main toolbar and send the complete editor document as one RAW UTF-8 ZPL job. Existing multiple-label blocks and ^PQ quantities remain authoritative.
Select the queueUse the main toolbar printer selector and refresh it when needed. The Printer sidebar has a separate selector for inspection and controls.
Match the setupConfirm the device understands ZPL and check label DPI, W/H, loaded media, sensing mode and ribbon where applicable.
Read success correctly“ZPL sent” means Windows accepted the job. Check the physical printer and queue to confirm actual output.
Zebra printer tools
The Printer tab combines Windows queue information with direct Zebra status and configuration queries where the connection supports them. Standard TCP/IP Zebra printers generally provide the richest information; USB, WSD, redirected and custom queues may expose Windows details only.
Media, pause, printhead, ribbon and last response. Lightweight status refreshes every five seconds while the tab is visible.
Model, firmware, resolution, connection, uptime, lifetime counters, print length, temperature and head test where supported.
Read-only print width, label length, offsets, darkness, speed, media type, print method, mode and orientation.
Available media, gap, peel, ribbon and cover readings. These static values refresh on selection or a full check.
Compare label and printer DPI, evaluate width and offsets, review warnings, and copy a concise technical summary.
Pause, resume, feed, clear printer-buffered work, print diagnostic labels or stored objects, and calibrate media.
Templates
The built-in 3 × 2 in Shipping Label template includes text and address fields, overlapping box graphics, a divider, a Code 128 barcode and Data Merge placeholders.
^XA
^FO200,60^A0N,30,30
^FD##NAME##^FS
^FO65,250^BCN,100,Y,N,N
^FD##BC11##^FS
^XZ
Loading the template changes the source only. Set the toolbar to 3 × 2 inches and choose the intended printer DPI for an accurate preview.
Troubleshooting
Check power, connection and the Windows queue, then refresh the Printer tab. For a network printer, verify its address and TCP port 9100 reachability.
Confirm the main toolbar queue, ZPL support, spooler state, media, ribbon, cover and pause status. Windows acceptance is not physical confirmation.
Compare W/H and units with the stock. Review ^PW, ^LL, ^LH, ^LS, ^LT, ^FO and ^FT, plus reported print width and offsets.
Use the printer DPI when only the preview setting is wrong. Convert the original source only when it must be rescaled, keep a backup and test the result.
Not supported or Not reported does not automatically indicate a fault. Availability depends on model, firmware, driver and connection type.
ZPL Studio v1.0.0 is currently unsigned, so Windows may show a warning on first launch. Download only from the official release link above.
For application, preview, printing or printer-status failures, find the diagnostic log location under Help → About ZPL Studio.